


How to Build an Android TV Box With a Raspberry Pi
Want to save money on TV streaming box? Learn how to build your own Android TV box using a Raspberry Pi!
Want to make a Raspberry Pi-based media center, but find that the basic Kodi install doesn't offer enough features? Don't worry, there is a tried and tested alternative: Android TV!
Here's how to install Android TV and enjoy the benefits of every popular streaming app that runs on Android, on your Raspberry Pi 3, 3 B+, and Raspberry Pi 4.
Android TV on Raspberry Pi
Before starting, it's important to understand that the versions of Android and Android TV used in this project are beta standard. As such, they come with certain shortcomings that you may not experience with an actual Android TV unit.
Three Raspberry Pi models are suitable for running Android TV:
- Raspberry Pi 3
- Raspberry Pi 3 B+
- Raspberry Pi 4
The steps for the Raspberry Pi 4 are below. Different steps are required for the Raspberry Pi 3 and 3 B+, which follow later.
Install Android TV on a Raspberry Pi 4
To build your own Raspberry Pi 4-based Android TV, you'll need:
- Raspberry Pi 4 (4GB or 8GB models are best)
- A good quality microSD card (16GB or more)
- Raspberry Pi 4 PSU
- USB keyboard and mouse (alternatively, a combi remote)
- USB flash drive
- HDMI cable
- Ethernet cable (optional)
With those items gathered, you're ready to start.
Step 1: Download and Install Android TV
To install Android TV on your Raspberry Pi 4, start by grabbing the LineageOS 18.1 Android TV build.
Download: LineageOS 18.1 Android TV by KostaKANG
Next, download and install Etcher from Balena. This is a versatile disk image writing tool, used here to create bootable SD cards for the Raspberry Pi.
Download: Etcher
You should then install LineageOS to the SD card using Etcher. Refer to our guide to installing a Raspberry Pi OS for details.
Step 2: Configure Android TV, TWRP, and GApps
Unlike the Raspberry Pi 3 build, Android TV setup on the Raspberry Pi 4 is pretty much ready to use out of the box. Having said that, you'll need to install a few apps which aren't included, not least GApps. However, a few tweaks are required.
First, though, you'll need to know how to use Android TV with a keyboard.
- F1 = Home
- F2 = Back
- F3 = View open apps
- F4 = Menu
- F5 = Power
- F11 = Volume down
- F12 = Volume up
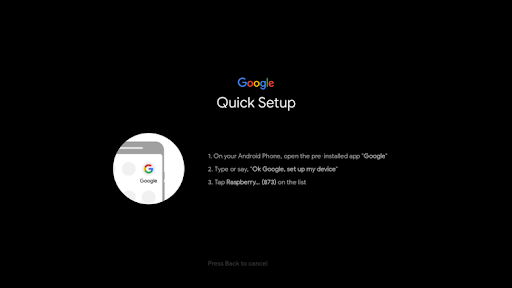
After connecting to your Wi-Fi network, enable developer options:
- Go to Settings > Device Preferences
- Open About
- Scroll to Build number and click this repeatedly until you see a message about Developer Options
- Go Back and you'll see the Developer Options menu under Settings
With Developer Options available, you can configure the Advanced reboot option to enable access to the TWRP recovery menu:
- Open Settings > Device Preferences
- Select Developer options
- Here, click Advanced reboot
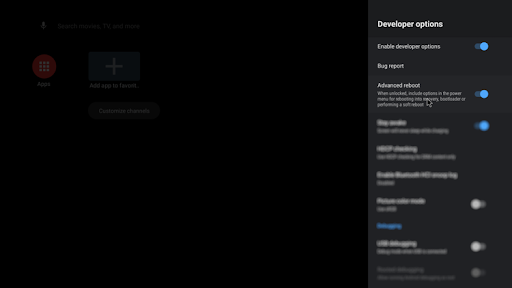
This allows you to access TWRP, which is required for flashing and sideloading, which is where the GApps package comes in.
Google Apps (GApps) packages for Android TV on the Raspberry Pi 4 are currently test builds. This means that features may be missing or unstable.
Download: GApps for Android TV on Raspberry Pi 4
Select the tvstock or tvmini package and download the ZIP file to your computer, then copy to a removable drive that you can connect to the Raspberry Pi.
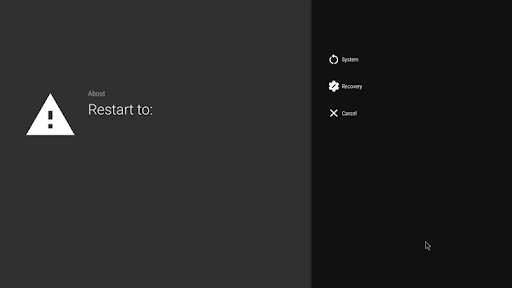
Once you've done that, boot to TWRP:
- Open Settings > Device preferences
- Select Reboot > Recovery
In TWRP:
- Select Install
- Browse to the GApps ZIP file
- Use Swipe to confirm flash and wait
- Next, select Wipe > Factory reset
To exit TWRP, restart the Raspberry Pi 4 using the Reboot option.
Step 3: Reboot Your Raspberry Pi 4 to Use Android TV
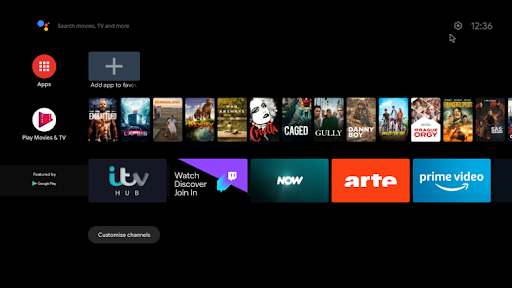
Now you've sorted out the Google apps, you can reboot the Pi 4 to start using Android TV. Sign into your accounts, download media streaming tools, or connect your own media to the system. It's all there for you!
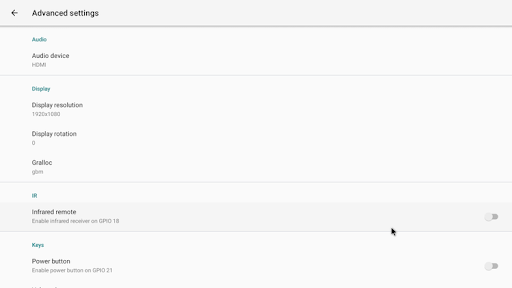
Want further configuration? This build of Android TV for Raspberry Pi 4 features several tweaks you can make to the set up. This covers everything from setting up a hardware power button to configuring SSH. You can also enable an IR remote and send audio through the 3.5mm jack instead of HDMI.
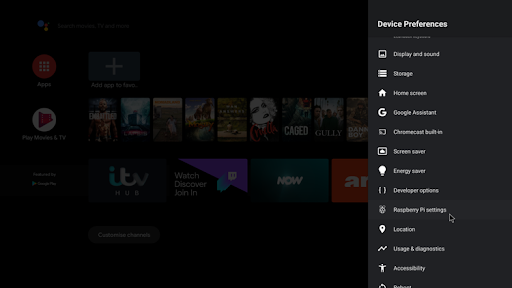
You'll find Raspberry Pi 4 specific options in Settings > Device Preferences > Raspberry Pi settings.
Tweaks and troubleshooting tips can be found on the download page at the KostaKANG website.
Install Android TV on Raspberry Pi 3 and 3 B+
If you have a Raspberry Pi 3/3 B+, the steps for installation differ somewhat. Before starting, make sure you have:
- A Raspberry Pi 3 or Raspberry Pi 3 B+
- A good quality microSD card
- Reliable Raspberry Pi power supply
- USB keyboard and mouse (or combi remote)
- USB flash drive
- HDMI cable
- Ethernet cable (optional)
To install Android TV on a Raspberry Pi 3 or 3 B+, you'll need the following software downloads:
- LineageOS 16
- Open GApps Pico package from opengapps.org
- Etcher SD card writing software
Ready to start? Let's go.
Step 1: Unpack and Install Android
Installing LineageOS on your Raspberry Pi gives you the benefit of the Android operating system. This means potentially better support for media software, such as YouTube and Kodi. With the right Google apps installed, however, your Android powered Raspberry Pi makes a great Android TV.
This is possible with various versions of Android for Raspberry Pi, but for the best results, use the LineageOS version linked to above. Before proceeding, ensure the ZIP file is unpacked.
You should then install LineageOS to the SD card using Etcher. Following installation and a successful boot, LineageOS requires basic configuration. Define the usual stuff: set country, time zone, etc.
Step 2: Prepare Android TV for Google Apps
Your Raspberry Pi is now running Android. This is a version based on AOSP which means that no Google apps are installed – you will need to install these manually.
You should have already downloaded the GApps package to your PC. Visit opengapps.org and select:
- ARM
- 8.1
- Pico
(It's tempting to select the Android TV option rather than Pico---don't. This is simply a larger file and doesn't really do anything other than cause problems down the line.)
Select Download, then when the GApps file is saved to your PC, copy it to your USB flash stick. Safely remove this and insert it into your Raspberry Pi.
Next, on LineageOS, open the app drawer and select Settings > System > About tablet. Here, scroll down to Build number and click it repeatedly. Eventually, this will add the Developer options menu to the previous screen.
Click back until you've exited the Settings app, then reopen it and navigate to System > Developer options. Select Root access and choose the Apps and ADB option, clicking OK when the warning is displayed.
Next, scroll down to Local terminal and enable the app. This gives you local shell access, which means you can enter commands via the keyboard.
Head back to the app drawer and open the Terminal app, then Allow the app permission to access your device.
Next, enter the superuser command:
su
A Privacy Guard warning box will appear. Check Remember my choice (to ensure future permission for what you're about to do) and then Allow.
Next, enter the command
rpi3-recovery.sh
This loads the recovery script. Enter the reboot command to launch it.
reboot
The Raspberry Pi will boot into the TWRP recovery console. Here, select Install, then Select Storage to choose your USB flash device.
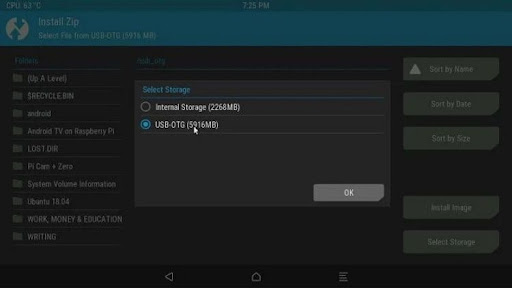
Select the GApps file, then Install Zip, and in the next screen check Reboot after installation, then Swipe to confirm Flash.
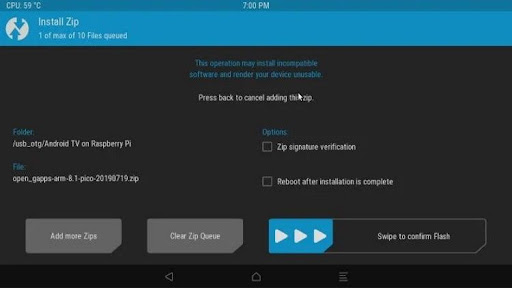
When the device reboots, you should be able to access the Play Store.
Step 3: Configure Your Android TV Interface
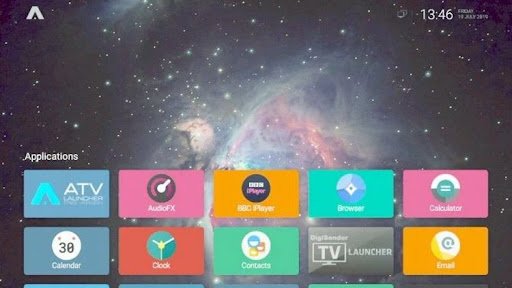
So far, you'll notice that the interface on LineageOS on your Raspberry Pi basically looks like Android, not Android TV. To change this, you'll need a launcher.
Several are available; we used an ad-supported launcher, ATV Launcher Free from the Play Store. Simply sign in with your usual Google account, search for it, and install. (Note that your initial sign-in to the Play Store will take a few moments to complete thanks to verification steps.)
With the interface sorted, you'll need to add some useful media apps. Things like YouTube, Plex, Amazon Prime Video, Kodi, and more work, and are all available on Google Play. Simply install these as usual to get the benefit of your existing subscriptions.
Note: Performance of these apps has proven mixed at best. For the best results, stick to YouTube. If you're looking for other apps, research to find the best versions to install.
Step 4: Controlling Your Raspberry Pi 3 Android TV
With everything up and ready, you will probably want to disconnect your mouse and keyboard in favor of something lightweight. Several remote options are available for the Raspberry Pi, which should work with Android TV.
One option is the Mini Wireless Keyboard/Air Remote Control which is combination device with configurable LED backlight.
Alternatively, you might prefer the iPazzPort Wireless Mini Keyboard with Touchpad. This combines the keyboard and touchpad along with a D pad and media controllers into one unit.
Both devices are wireless and ship with a dedicated Wi-Fi dongle specifically keyed to remote controls.
Enjoy Your Media With Android TV for Raspberry Pi!
By now you should have a Raspberry Pi 3 or later pumping out videos and music using the LineageOS with an Android TV user interface. To all intents and purposes, you have a DIY Android TV box!
Admittedly, you may run into trouble with performance, so ensure your microSD card is up to scratch. Also, check you're using an approved Raspberry Pi power supply. This will ensure the Pi gets the power it needs without risking undervoltage and microSD card corruption.
Like the feel of Android TV but aren't getting the best results? Maybe buy an Android TV box instead.


Leave A Reply